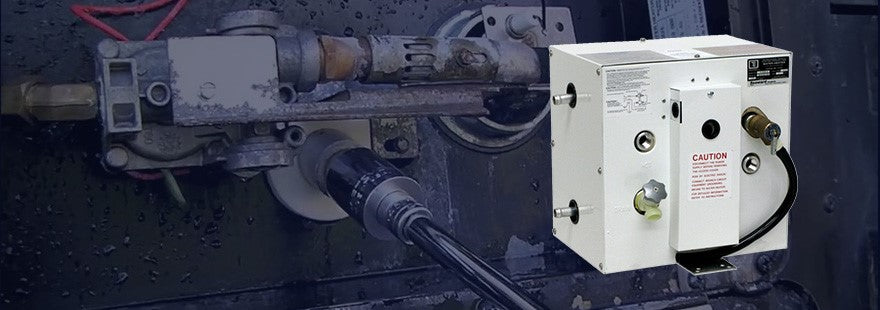
How to Install an RV Water Heater
So, you’ve purchased a brand-new RV water heater? Congratulations! You can now experience the comforts of home within the confines of your camper. But first, it needs to be installed.
You obviously have two options—hire a professional or attempt to install it yourself. Either is a perfectly viable option, but if you do decide to tackle the task yourself, there are a few things you need to know. The first of which is that anyone who is even the smallest bit handy can replace an RV water heater. The most important things to keep in mind are to take your time and to fully read the directions.
The following is a step-by-step guide for installing your new camper water heater. Understand that this guide to installing RV water heaters is in no way exhaustive and should be used along with the manufacturer’s manual.
1. Cut Off the Power
Before you proceed with anything else, you need to cut off the power. Turn off your water heater and everything flowing into your old RV water heater. This includes the water connection, the gas and/or electricity, and the 110V power. Be sure to let the water cool if needed before moving to the next step.
2. Drain the Water Heater
Next, you’ll want to fully empty your RV water heater tank by simply removing the drain plug. Have a bucket or pan handy to catch the little bit of water that’s still sure to be in your water tank even after you drain it. Make sure your water isn’t hot when you do this.
3. Disconnect the Inside Connections
Before you disconnect any connections, get a feel for the inside of your unit. On the inside of your old water heater, there should be a high-temperature switch that shuts off if the temperature gets too hot. This often comes with a pressure relief valve.
Prior to disconnecting the gas line, double check that the propane is shut off at the bottles and that your RV water heater is blocked. Now, your propane line typically runs through a grommet in a hole that is sealed up with a type of sealant. Simply peel the sealant off with a utility knife and a pair of pliers. Use the utility knife to cut the grommet and remove it from your workspace. Now, with your propane off, you can disconnect the gas line.
At this point, you can also disconnect the water lines from the rear of your now empty RV water heater. First, you’ll need to remove the fasteners used for the plumbing (a top one and a bottom one). Begin by breaking these loose a little and you should be able to unthread them. Be gentle. If done correctly, you should be able to reuse them for your new water heater. These lines usually hold a bit of water, so it’s smart to use a drip pan to catch any water that may escape while disconnecting the lines.
4. Remove the Old Unit
At this point, you can go out and remove all the screws that were securing the old RV water heater case into the body of your RV. Once these screws are removed, pull the old unit forward a couple of inches. Clear the gas line through the hole.
Next, you’ll want to disconnect the electrical lines in your junction box. But first, take a look at the wiring that goes into the top. Before you remove the old unit, make a note or take a photo of which colored wires on the water heater match to which colored wires on the RV so connecting the new unit will be easier. Note that the wire colors coming from the RV don’t usually match the wires coming from the RV water heater.
On the back of the tank is where the 110V connection is. Be sure this line is disconnected. Now that everything is safely off and disconnected, you can remove your old camper water heater!
5. Prep to Install the New Unit
Before you even touch your new RV water heater, there’s a little bit of prep work that you’ll have to do first. Bend up the edges 90 degrees around the entire perimeter of the opening’s frame using a pair of channel lock pliers to make way for your new unit. That’s the extent of your prep work. That wasn’t so bad, was it?
6. Connect Your New RV Water Heater
Once you’ve removed all the wrapping and packaging from your new unit, you can slide the water heater into place and partially into the opening. At this point, it will help to have a second set of hands.
First, remove the new grommet that is filling the propane line hole in the heater. Then, thread the propane line through the opening. At this point, while it’s still accessible, resplice the electrical wires. Then, use clips, wire nuts or electrical tape to ensure lasting durability.
Now, caulk or seal the case to the body and push your new RV water heater the rest of the way into the allotted space. But don’t tighten the perimeter screws fully yet.
7. Seal the Gas Line
Once you’ve fed the gas line through the line hole, cut one side of the new grommet and slip it around the gas line. We’re doing this because the line has already been flared and the grommet simply won’t fit over it as is.
After you’ve reconnected the gas line, you’ll want to coat and seal the grommet with a rubber/silicone sealant. By doing this, you’ll prevent a gas leak from getting into the interior of the RV. Look for an auto/marine sealant that’s rated for both fuel and petroleum products.
8. Check for Gas Leaks
Now that you’ve sealed your lines, you need to test the unit for any gas leaks to make sure it’s sealed properly. To do this, you’ll need to first turn your gas back on. Then, it’s time for the good ole dish soap method. Simply drip a bit of soap on the joint and look for bubbles. No bubbles mean no leaks and you’re good to go!
Next, you can replace and/or tighten the rest of the frame screws. Where you bent the edges of the frame, you’ll see a perforated line. Use additional sealant along this line to seal the perforations so no gas or moisture can seep into your RV.
Now, you can hang your new door on the case and hook up the water lines inside to the RV water heater.
9. Check for Water Leaks and Finish Up
Your electricity is running, your gas lines are hooked up, the water lines are connected so you’re all done, right? Well, almost. The last step is checking your new unit for water leaks. Simply turn on the water pump, fill the tank and watch for leaks.
If there are no apparent leaks, push the water heater ignite button, step back and admire your work—you did it! You are done. See, that wasn’t too bad.
Browse RV Water Heaters From Boat & RV Accessories
Need a new RV water heater and don’t know where to start? Don’t wait until it’s too late to replace it! Browse Boat & RV Accessories for our massive selection of RV water heaters, appliances and more. Have a question or need more information? Reach out to us today!